MFA Authentication in Microsoft Services
Index
The short summary of MFA
Start using MFA
Configuring Microsoft Authenticator to multiple phones
Changing the default authentication method
The reset of MFA
The short summary of MFA
With MFA (Multi-Factor Authentication) logging into Microsoft services is made more secure. A mobile device is needed to log in with MFA in addition to the usual username/password combination. A verification is made on the mobile device using the Microsoft Authenticator app or with a text message code.
Microsoft services "remember" your login details if you haven't explicitly logged out of the app, so with an app like Teams you do not have to authenticate using MFA every time you use the app. So MFA authentication is usually needed only after you have logged out from an app - most often because the browser has been closed or when the specific app hasn't been used in a while.
Note! You can not log in to Microsoft services without your mobile device (effective from Nov 30th 2020).
Start using MFA
|
Note: that the setup process requires two devices. We recommend completing these steps on a computer and using your phone only when required. |
1. Open a internet browser on your computer and go to the following link https://mysignins.microsoft.com/security-info.
2. Enter your username in the Microsoft sign-in window.
| Note: Open University students, please remember to use your University of Vaasa account in the format ending with @student.uwasa.fi. Unfortunately, it is not possible to sign in with personal email addresses such as Gmail or Hotmail accounts. |
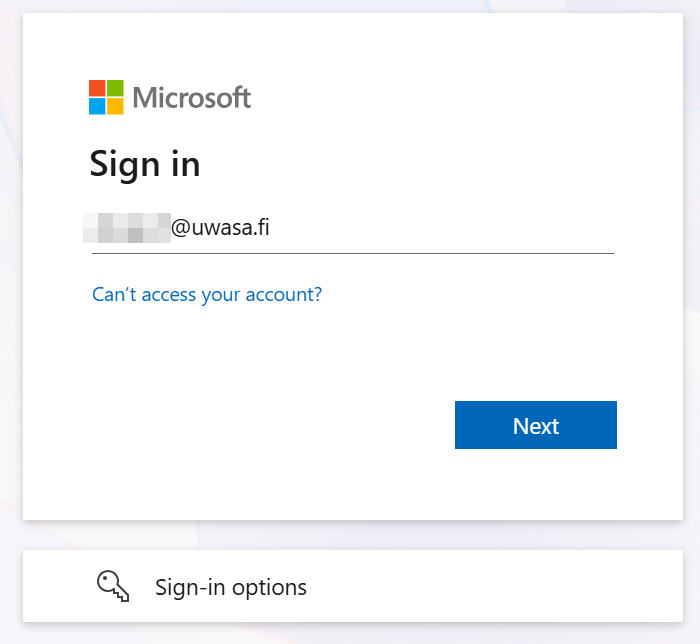
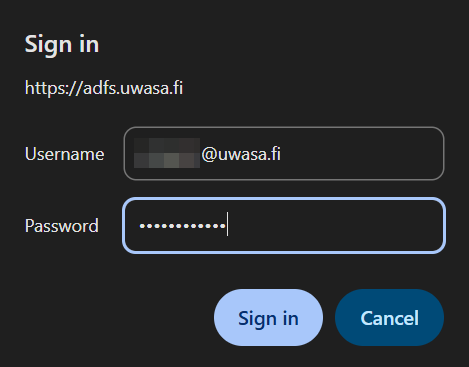
3. You will then be redirected to the University of Vaasa sign-in page, where you can enter your username and password.
| Note: This step may look different depending on the browser you are using. |
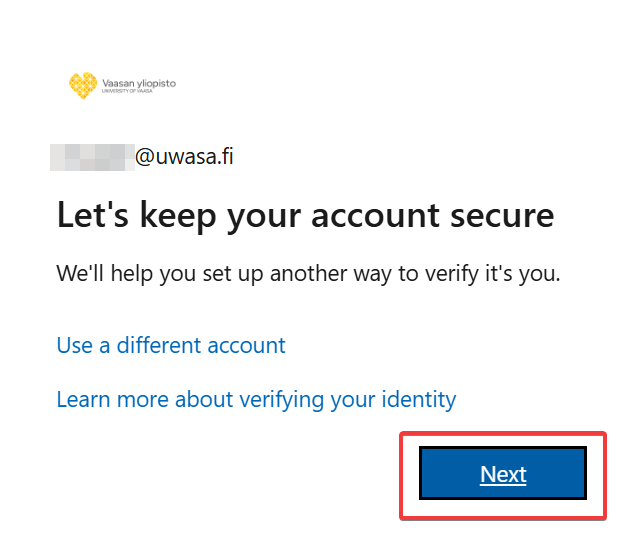
4. In the "Let's keep your account secure" window, select "Next".
5. When you reach the "Install Microsoft Authenticator" screen, take out your phone and open either the App Store or Google Play Store, depending on your device.
| Note: Install the app specifically through the App Store or Google Play Store. Do not attempt to install Authenticator through a web browser. |
If you have already installed and used the Microsoft Authenticator app on your phone, proceed directly to Step 10.
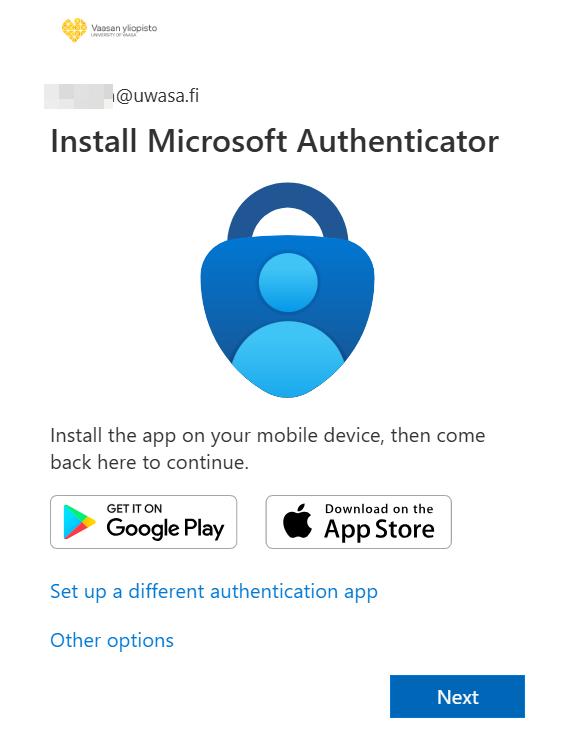
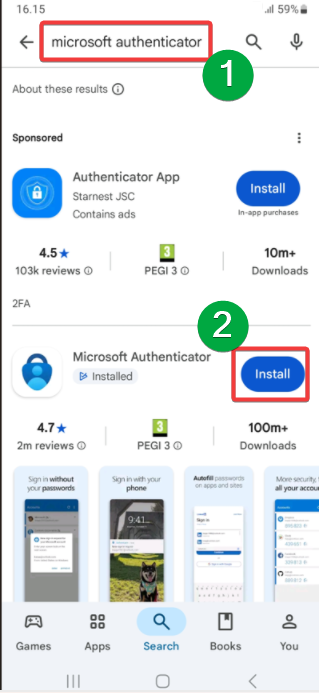
6. In the App Store or Google Play Store, search for "Microsoft Authenticator" and install the app.
|
Note: Make sure that you install the actual Microsoft Authenticator app. Even if the app name is entered correctly, the App Store or Play Store may list a different application first. Microsoft Authenticator is free to download and use. |
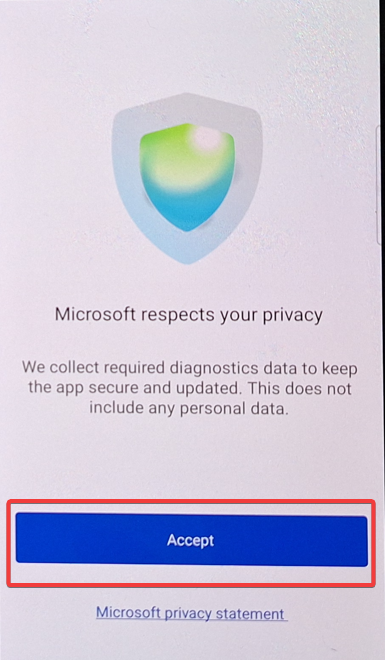
7. Once the app has been installed and opened, select "Accept" on the "Microsoft respects your privacy" screen.
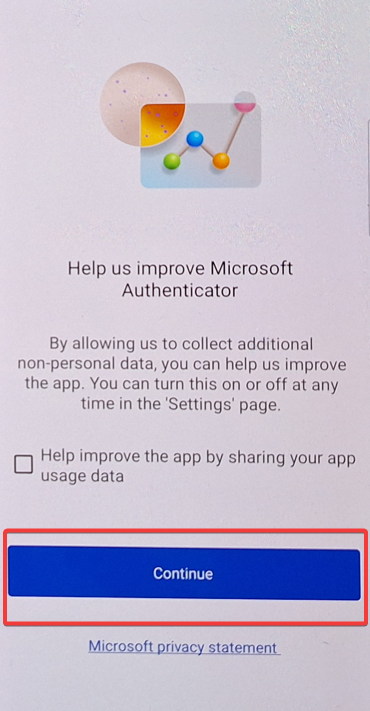
8. On the "Help Us Improve Microsoft Authenticator" screen, you may leave the option unchecked and continue by selecting "Continue".
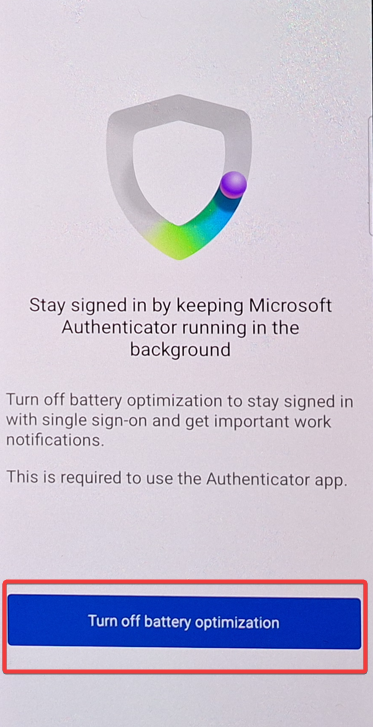
9. On the "Stay signed in by keeping Microsoft Authenticator running in the background" screen, select "Turn off battery optimization".
10. Select "Scan QR code". If you have previously used Authenticator, tap the QR scan button in the bottom-right corner.
The Authenticator app on your phone will enter QR scanning mode.
|
|
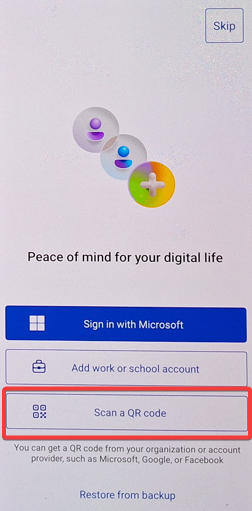
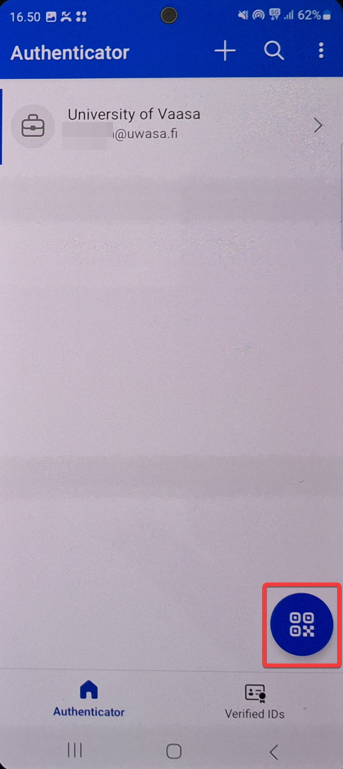
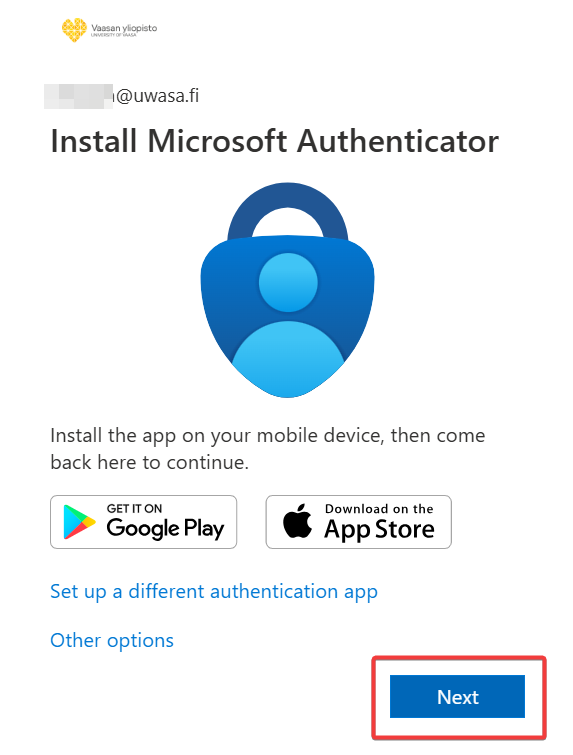
11. Return to your computer and select "Next" on the "Install Microsoft Authenticator" screen.
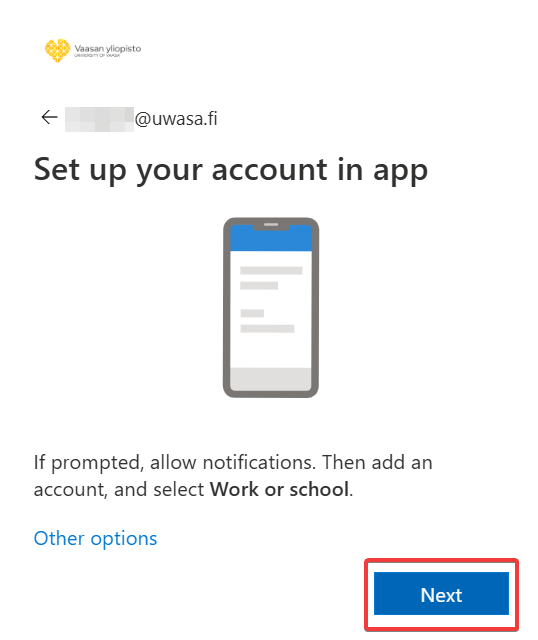
12. On the "Set up your account in app" screen, select "Next".
13. Point your phone, while Authenticator in the QR scanning mode, at the QR code displayed on your computer screen. Your account will then be linked to the Authenticator app. Proceed with "Next"
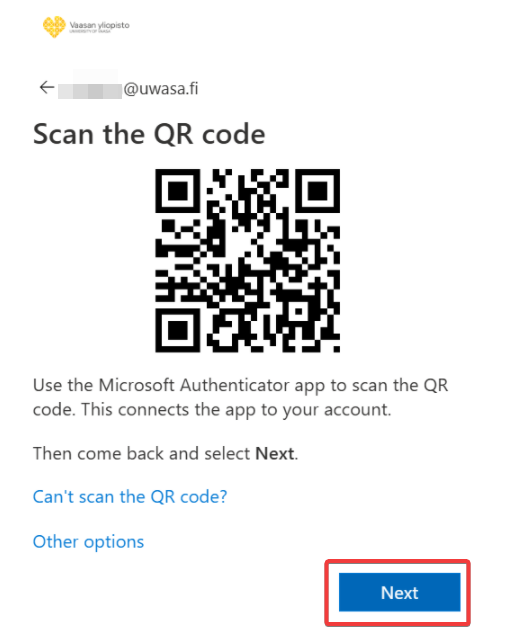
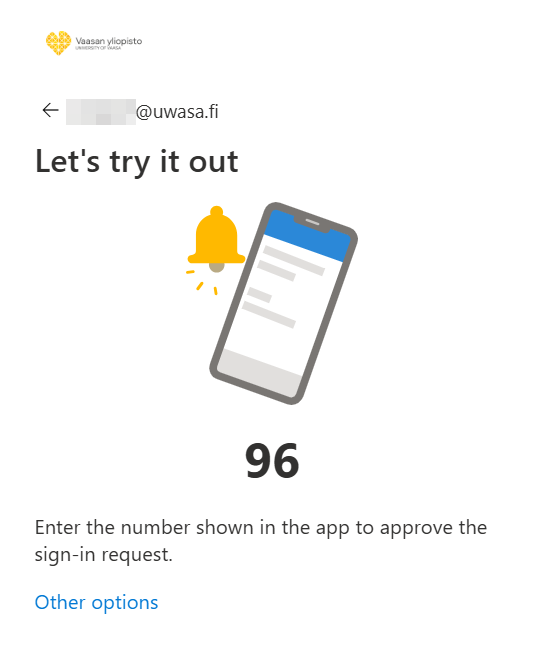
14. Microsoft will now test the connection by displaying a two-digit number. Enter this number into the Authenticator app on your phone.
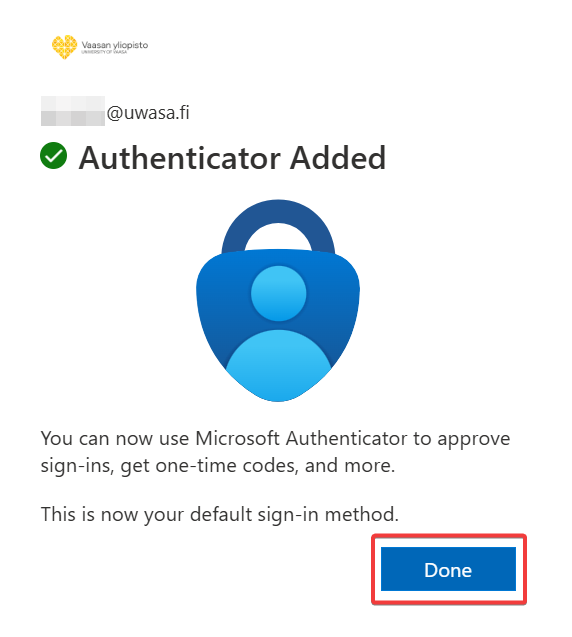
15. On the "Authenticator Added" screen, select "Done".
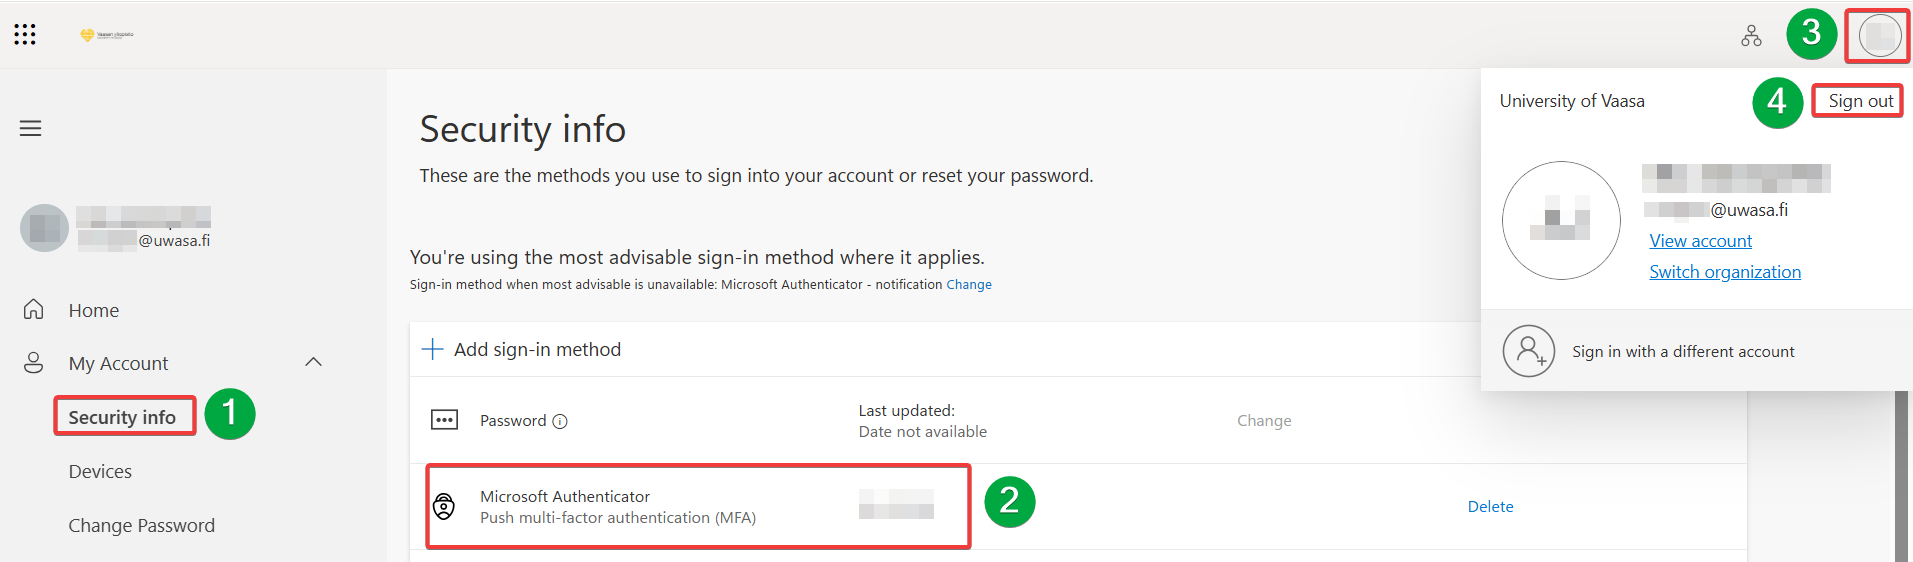
16. In the security settings view that opens, you will see your authentication methods. Finally, you can sign out by selecting "Sign out" from the profile menu in the top-right corner. Your Microsoft Authenticator app is now configured and ready for use.
Configuring Microsoft Authenticator to multiple phones
You can configure Microsoft Authenticator to multiple phones.
1. Go to your student account’s security settings: https://mysignins.microsoft.com/security-info.
2. Select “Security info” from the left panel, click on “Add sign-in method” and then choose “Authenticator app” from the dropdown menu (see the below picture also).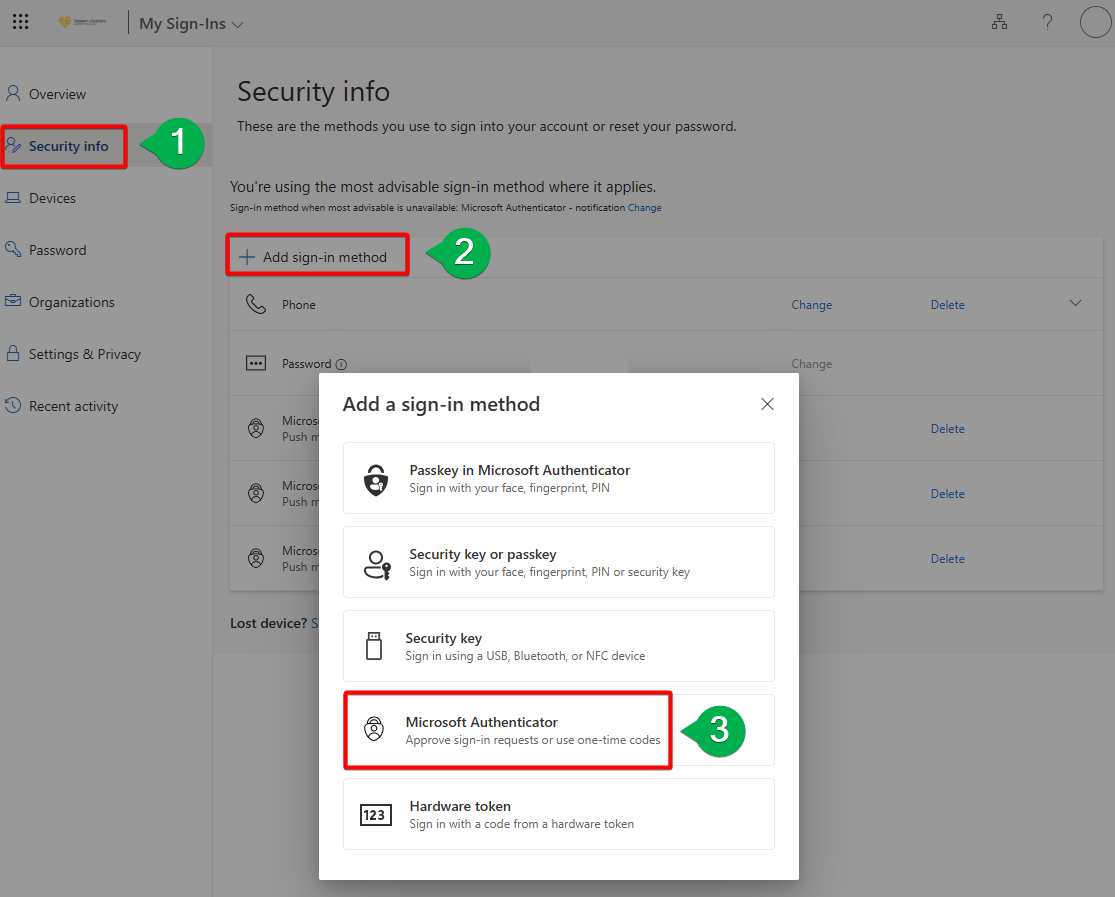
3. After that you can proceed by following these instructions from the fourth (4.) step onward.
Changing the default authentication method
You can change the notification-based method as your default by following these steps.
1. Go to your account’s security settings https://mysignins.microsoft.com/security-info.
2. Select ”security info” from the left panel and select “change”. Select “App based authentication - notification” on the popup window’s dropdown menu (see the below picture also).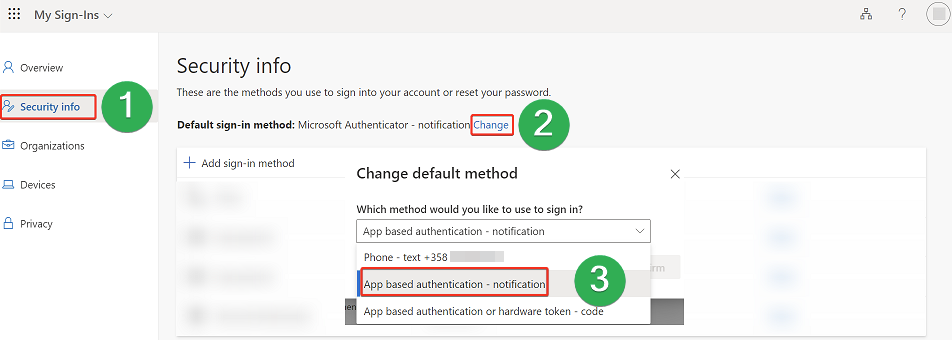
3. After this you can logout from MFA settings.
The reset of MFA
You can reset your MFA via the Suomi.fi service. Please go to our identity service from this link and select the option "reset MFA". After the reset, you can re-configure the authentication by following these steps.